I am pleased to announce a new release 0.3.1 of Entangle, a GTK3 desktop application for tethered camera control & capture, is available for download from the usual location. This release has focused exclusively on bug fixing following the major refactoring that went into the previous release. If you were having trouble with the previous release crashing, then I hope this new one should improve things significantly.
- Fix crash in handling camera control combo list
- Add notice about need to set XDG_DATA_DIRS when installing into unusual directories
- Add workaround to avoid immediate crash if schemas were not found in XDG_DATA_DIRS
- Compile schema files after installation
- Fix crash updating widget sensitivity
- Fix crashes & race conditions during capture of images
- Fix infinite preview error message popups which can hang the window manager
- Fix crash when retrying a failed connection attempt
- Fix thread locking when hiding status display
- Avoid running multiple threads for monitoring status
- Fix initial sensitivity of camera control panels
- Update README with new URLs for bugs/mailing lists
Since the latest release I have also registered Entangle with GNA!, to get support for mailing lists and bug tracking.
Over a year has gone by since I released Entangle 0.2.0, so I am very pleased to be able to announce that I have now just released Entangle 0.3.0, available from the usual download place which also contains the concise list of changes.
There have in fact been a great many changes in this release, but many of them will not be immediately obvious from looking at the updated screenshots.
First of all, has been a big effort to port to the latest best practice desktop application libraries
- Port Gtk2 to GTK3. To enable use of many of the new desktop features, in particular, libpeas, Entangle now targets Gtk3 instead of Gtk2
- Port LibGlade to GtkBuilder. With the use of Gtk3 there is no longer any point in using the external Glade library for UI building. Instead Entangle now uses the GtkBuilder infrastructure that is part of regular Gtk
- Port GConf to GSettings. With the use of Gtk3, a newer Glib2 is required, which in turn brings in the GSettings APis. With these present, there is no longer any point in using the external GConf library
- Port Unique/StartupNotifications to GApplication. Again, since a newer Glib2 is required, it is possible to take advantage of the GApplication APIs, to avoid using the external Unique/StartupNotifcation libraries.
Next up was a major internal rewrite of the way the UI handles camera operations. In previous releases, most operations were handed off to a camera scheduler thread. The design of this was overly complicated and not friendly to future extension. Having recently gained experience with the way asynchronous operations are done by the GIO library, I decided that this would be an effective approach for Entangle. So all the internal thread scheduling code was ripped out, and the GIO style asynchronous APIs were added in its place. Doing this work was a major blocking item in why it has taken so long to release 0.3.0. Now it is all complete, I am very pleased with the way it has turned out. The code for dealing with the camera is so much simpler & more flexible at the same time.
With that out of the way, there are the general user visible feature improvements
- Config refresh. For Nikon cameras, Entangle automatically updates the UI whenever any camera configuration setting changes
- Continuous monitoring. Instead of having to explicitly start/stop monitoring, Entangle now monitors the camera for new images at all times, and auto-downloads them as they are captured
- Continuous preview mode. Previously preview would be stopped after an image was captured. Now it is possible to capture many images in sequence, while remaining in preview mode
- Folder preserved. Previously when connecting to a camera, the session folder would be reset to a default location based on camera model name. Now Entangle simply always remembers the user’s last folder
- Avoid delete after download. The default behaviour is to delete files from the camera after downloading. This can now be disabled, to allow images to remain on the memory card.
- Config UI improvements. The UI for displaying camera settings has been improved & simplified. The “Other PTP properties” panel has been removed to improve UI performance. The ‘Camera Status’ panel now just uses labels, instead of readonly text fields for a more compact display.
- Image metadata summary. When moving the mouse over the Entangle window, a summary of the image metadata (extracted with GExiv2) will be displayed, showing the aperture, focal length, shutter speed, ISO and resolution.
With such large changes in the basic infrastructure, there are bound to be new wierd bugs introduced, but overall this release should be a good foundation for ongoing incremental development of Entangle.
Last week I mentioned how I had started running F12 with a colour managed desktop wherever possible with the application. Today I had need to capture some screenshots of a new (& as yet unannounced ) application I’m working on. There are two ways I normally capture screenshots. The first is to just press the ‘PrintScreen’ button, let GNOME save the PNG image and then crop it in GIMP or something like that. The second way is to use GIMP’s own screen capture function (File -> Create -> Screenshot), useful if you want an capture of a specific window instead of the whole desktop.
Today I acquired the screenshot using GIMP since I already had it open. And the colours in the screenshot looked like complete garbage. It shouldn’t be hard to understand what went wrong here. The default ICC profile for new images created in GIMP is the sRGB colourspace. In image windows, GIMP applies a transformation to the image colours, going from the sRGB profile to the monitor’s calibrated profile. Except that since this image was created from a screenshot of a colour managed display, the colours have already been transformed according to the monitor’s profile. GIMP is in essence applying a duplicate conversion. It is no wonder the result looks awful.
Having realized that a duplicate conversion was taking place, the solution is easy. Tell GIMP that the image is in the monitor’s colourspace, rather than the default sRGB. This is done using the menu Image -> Mode -> Assign Color Profile. With the ‘Assign colour profile’ operation, you are not changing the pixel values in the source image, merely telling GIMP how to interpret them. Since it now knows the image is already in the monitor’s colourspace, the transformation becomes a no-op, and the image displays in sensible colours again.
It is possible to leave it at that, save the image and do whatever you were going todo with it. This is sub-optimal if you intend to distribute the image to other people. The sRGB colourspace is intended as a generic colourspace which has reasonable display characteristics even on monitors which are not calibrated / colour managed. If uploading the web, most people viewing the image are not going to have colour managed displays. Thus, if you want the image to look reasonable for them, it is wise to now convert it to the sRGB colourspace. This is done using the menu Image -> Mode -> Convert to Color Profile. In contrast to the ‘Assign’ operation, the ‘Convert’ operation does the change the actual pixel values in the source image. Depending on the overlap between the monitor’s colourspace and the sRGB colourspace, and the rendering intent chosen, this will be a slightly lossy process. The image colours won’t display in quite same way as before, but it will display better on other people’s monitors.
In summary, if you are taking screenshots of a colour management aware application on a colour managed display, you need to first assign the monitor profile to the captured image, and then convert it to the sRGB profile. Oh and remember that, depending on the source of the data, this assign+convert step may also be required when pasting image data from the clipboard.
It has been a long time coming, but the Linux desktop is finally getting to the point where colour management is widely available in applications. At a low level ArgyllCMS is providing support for many colour calibration devices and lCMS provides a nice library for applying colour profile transformations to images. At a high level, the graphics/photos tools DigiKam, GIMP, UFRaw, InkScape, Phatch and XSane are all able to do colour management. Most are even following the X colour management spec to automatically obtain the current monitor profile. In the last few weeks Richard Hughes has filled in another missing piece, writing gnome-colour-manager to provide a UI for driving ArgyllCMS and setting up monitor profiles upon login.
It is great to be able to do photo/graphics work on a fully colour managed Linux desktop….and then you upload the photos to Flickr and they go back to looking awful. After a little googling though, it turns out all is not lost. Firefox does in fact contain some colour management support, hidden away in its truly awful about:config page. If you go to that page and filter on ‘gfx’, you’ll find a couple of settings with ‘color_management’ in their name
gfx.color_management.display_profile
gfx.color_management.mode
gfx.color_management.rendering_intent
The first, display_profile, takes the full path to an ICC profile for your monitor, while mode controls where colour management is applied. A value of ‘2’ will make firefox only apply profiles to images explicitly tagged with a profile. A value of ‘1’ will make firefox apply profiles to CSS and images, assuming an sRGB profile if the image does is tagged. rendering_intent takes values 0, 1, 2, 3 corresponding to ‘perceptual’, ‘relative colourimetric’, ‘saturation’ and ‘absolute colourimetric’ respectively. I configured my firefox for mode=1, set a profile and restarted. Browsing to Flickr to showed an immediate improvement, with my images actually appearing in the correct colours, matching those I see during editing in GIMP/UFRaw/etc. There’s a little more info about these settings at the mozilla developer notes on ICC.
While it is nice to have colour management in firefox, its implementation is rather sub-optimal since it requires the user to manually configure the display ICC profile path. Each display profile is only valid with the monitor against which it was created. So the moment I switch my laptop from its built-in LCD to an external LCD all the colours in firefox will go to hell. If firefox followed the X ICC profile spec it would be able to automatically apply the correct profiles for each monitor. Hopefully someone will be motivated to fix this soon, since the spec is rather easy to comply with only needing a quick look at a particular named property on the root window.
While browsing around the web a few weeks back I discovered a fabulous new way to waste occupy my time while waiting for code to compile in the form of FlickrVision. A globe showing satellite imagery of the Earth, spinning around every few seconds to show a newly uploaded & geo-tagged photo from Flickr.
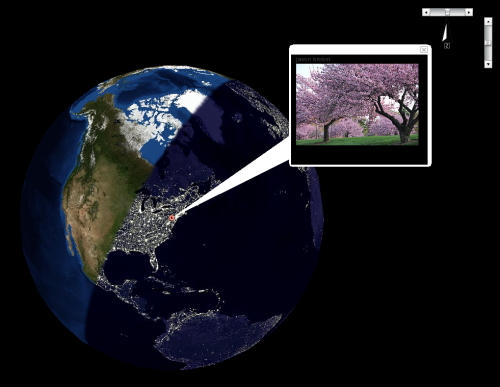
For those without flash it also comes in a plain old 2-d format, but that’s not nearly so entertaining.