If you’ve spent any time manipulating / scanning / printing photos you’ll know that getting the colours on screen to match those of the original slide / negative and / or those of the final print is rather non-trivial. Welcome to the special 10th circle of hell that is device colour management. Fortunately there are ways out of this purgatory, in particular for monitors I’m talking about colourimeters; Unfortunately nearly all of these hardware devices require use of Windows or Mac OS-X.
After an extensive Googling session I eventually discovered that a gadget called the Monaco Optix XR is the branded name for the DTP-94 device. This device is in turn the only low cast (ie < $1000) hardware currently supported by Argyll CMS (a set of open source programs for doing colour management including display calibration & profiling).
The bad news is that the company making the Monaco Optix was acquired by x-rite whom (oblivious to this device’s unique selling point for Linux users) have apparantly discontinued its production :-( There’s still various photo stores which have them in stock, so I picked one up from Midwest Photo Exchange. On a more promising note though, I’ve also just read in the Argyll CMS lists that the current development snapshot releases have support for a couple of the Eye-One devices. So perhaps all is not lost of Linux users in the future after all!
Now that I’ve got this device its time to figure out how on earth the Argyll CMS software is actually supposed to be used. There is alot of documentation, but it is far from clear what the best process to go through is. In particular while it can be used with LCDs, the docs are not too good at describing which things need to be done differently for LCDs vs CRTs. Oh well, I’ll figure it out in the end. Getting the monitor setup correctly is also only one of the problems. I still use film for all my photography, scanning it in with a Nikon CoolScan. This needs profiling/calibrating too, so I’ve a set of IT 8.7 scanner calibration targets on order from a cheap source in Germany.
For a couple of years now I’ve been using a Nikon Coolscan V for scanning my 35mm negatives & slides into digital format. While it is not supported by the open source Sane software, the cross-platform VueScan software does a fanatastic job of driving it, even including support for the ICE (infrared) cleaning. VueScan is the first piece of commercial software I’ve bought in years, and I can say it is well worth the $80 for their professional edition which provides lifetime upgrades. If you’ve got a scanner which isn’t supported by Sane, then its worth checking it out.
This was all well and good, but I’ve got and ever increasing number of medium format negatives & slides taken with my Zero Image 2000 pinhole camera which won’t fit in the Nikon. So I went looking for a medium format scanner and finally settled on the Epson Perfection 4490 which was well rated by a number of photographic magazines, and a snip at only $200 – a small fraction the price of the dedicated Nikon film scanner when I bought it back in London.
Getting it working under Linux was a little bit of a roller-coaster ride. I plugged it in, added its USB vendor & product IDs to hotplug usermaps, re-plugged it, and fired up VueScan. “No scanners found”, damn. Checked the device permissions, fine. Tried Sane instead, “No scanners found”. Odd, because various web postings claimed it worked with both Sane & VueScan. Upgraded to the latest version of VueScan, still nothing. I was mildly worried that I had a dud unit now. I re-checked the release notes for VueScan, where-upon I discovered the small print – its only supported if you have the Epson drivers installed, because it needs a firmware loaded. Fortunately it turns out that Epson are a (reasonably) Linux friendly company, providing a Linux version of their scanner software for a large number of distros. The firmware itself is closed source & proprietry, but they do provide both a Linux version of their scanner software (IScan) and a SANE backend, under the GPL (+ an exception to allow them to deal with the firmware loading library). With this all installed, I now have a choice of 3 programs to do scanning with, Sane, IScan, and VueScan.
The only remaining problem is that if I try to scan at the full 4800 DPI my laptop (with 768 MB of RAM) goes into a swap death spiral, because the combination of the raw RGB scan, the infrared scan and the post-processing requires on the order of 1 GB of memory for a single medium format slide. So I’m stuck at 2400 DPI for while, until I talk myself into shelling out for a new desktop with 4 GB of RAM. That said, this is more than adequate for now – the image below is a scan of one of my first pinhole images from a year & a half ago in London, scaled down from 5000×5000 pixels.
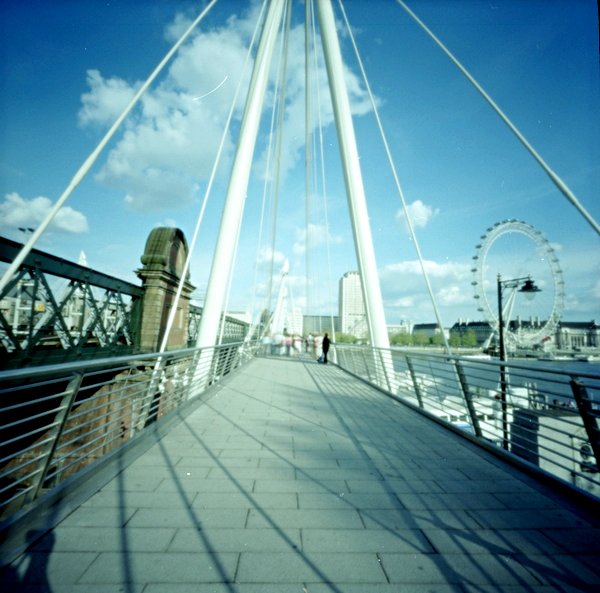
One negative done, 195 to go…I may be some time…
So while I’ve got an existing gallery site for putting up my general pictures / snaps, I felt I needed something a bit more styled & professional looking for my serious photographs. So with a few hours work I put together an initial photo site
I’ve just finished a short (10 week) course Improve you Photography with Chris Ould, at Central St. Martins. It split into two halves, the first concentraing on the theoretical side of things, basic modes of camera operation, composition, lighting, use of flash, etc, etc – all the usual expected subjects. At the end of each week, we’d have an assignment to do, one set on “form”, another on the subject of “motion”, another still on “lighting”. Finally was one examining people & their surroundings, for which I paid a visit to Columbia Road Flower Market. This assignment led into the second half of the course, working in the darkroom
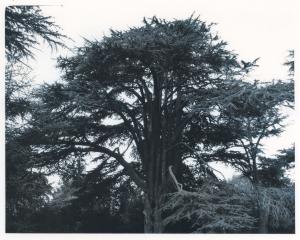
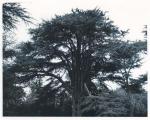
First off was developing of film from our previous assignment – scans from the results as in the gallary. After that the real focus was on printing, where I was amazed to see just how much of a difference you can make to a photo. Selective cropping, enhanced contrast and very light toning made a significant improvement to this shot of tree branches.
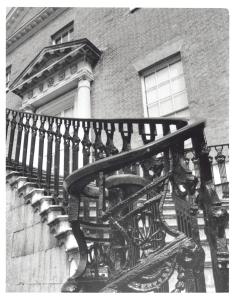
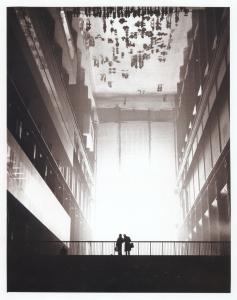
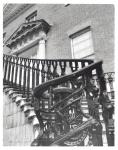
Dodging, which is the technique of obscuring part of the scene/paper during exposure under the enlarger, makes it possible to bring out detail in dark parts of the scene while still giving the rest its normal exposure time. In this picture, the railings in the original were practically pure black, but dodging allowed the full detail to be pulled out.
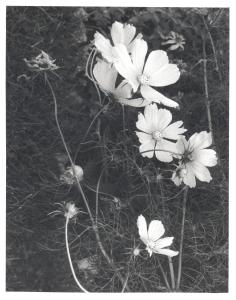
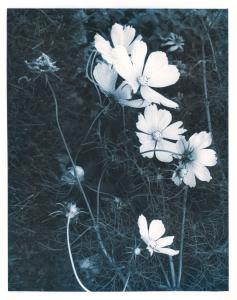
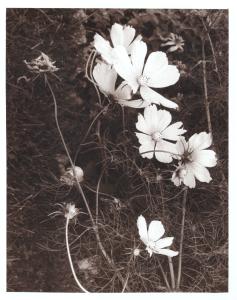
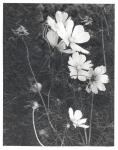
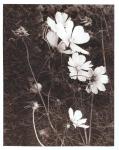
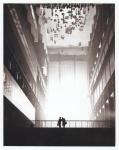
In toning, previously developed prints are soaked in water and then put throug a bath containing one of many possible colourings. For the course, we had access to a copper tone and brown, almost sepia like tone. Having tried the tones on a handful of different prints you can see which tones suit a particular type of scene best. For example, the flowers below are most effective in brown.
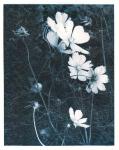
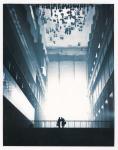
While this shot of the Weather Project, at the Tate Modern, works best in the blue tone, taking on an almost apocalyptic feel.
All in all, the course was a huge success, and I’d definitely recommend anyone with more than a passing interest in photography to give it a try.